
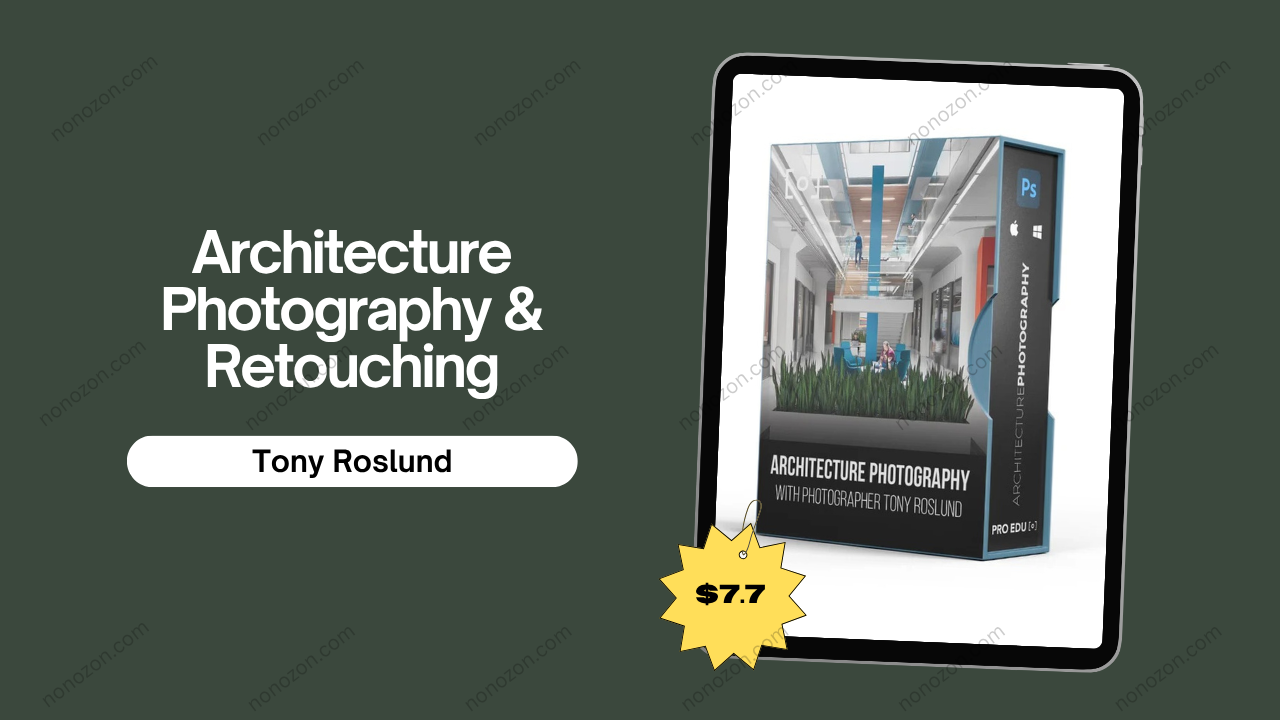
Architecture Photography & Retouching
by Tony Roslund
Architecture Photography: A Comprehensive Guide
Check proof of content here:
Architecture is more than mere construction; it is an art form that captures the essence of human creativity and exploration. When translating such artistry into images, a photographer must possess the technical acumen, the right equipment, and the refined artistic vision to convey the true splendor of structures. Architectural photography goes beyond simple documentation; it delves into the emotions evoked by lines, textures, and spaces that tell stories of culture, innovation, and history. In this article, we will examine various aspects of architectural photography, including essential equipment, techniques for capturing stunning images, and the importance of retouching to enhance the final product. Photographer Tony Roslund's insights will guide us through the intricate dance of architecture and photography, allowing us to perceive buildings not just as structural objects, but as narratives woven into the fabric of our built environment.
Essential Equipment for Architecture Photography
Every photographer knows that the right equipment is paramount in executing a vision. Architectural photography requires specific gear to capture sharp, detailed images while maintaining the integrity of the structures being photographed. Below is a guide to essential equipment that no architectural photographer should be without:
- Cameras: For architectural photography, a DSLR or a mirrorless camera with a full-frame sensor is often the weapon of choice. These cameras allow for wider dynamic range and better low-light performance. Models like the Canon EOS R5 or Sony A7R IV are top contenders thanks to their resolution and versatility.
- Lenses:
- Wide-Angle Lenses: Lenses ranging from 16mm to 35mm excel in capturing expansive architectural scenes. They allow photographers to fit more of the building into the frame, conveying the structure's grandeur. Popular options include the Canon EF 16-35mm f/4L and Nikon Z 14-30mm f/4 S.
- Tilt-Shift Lenses: These lenses, such as the Canon TS-E 24mm f/3.5L II, are essential for controlling perspective. They allow photographers to keep vertical lines straight and eliminate distortion, which is common when shooting tall buildings with standard wide-angle lenses.
- Tripods: A solid tripod is indispensable. It provides stability, especially when shooting in low light or embarking on long exposures. Look for sturdy models like the Manfrotto Befree Advanced Aluminum Tripod for reliable support.
- Lighting Equipment:
- External Flashes: For illuminating interiors or highlighting specific architectural details, something like the Godox AD200Pro is beneficial. Using softboxes diffuses the light and minimizes harsh shadows.
- Reflectors: A simple yet effective tool for bouncing light can bring life to a scene, reducing dark areas in an image.
- Accessories:
- Grip Kit: A collection of clamps, tape, and other tools to assist with managing and positioning equipment on-site.
- Editing Software: Software like Adobe Lightroom and Photoshop is essential for post-processing, refining your images to prepare them for presentation.
These elements form the backbone of effective architectural photography. Each piece of equipment aids in capturing the subtle intricacies of architectural designs, elevating them from ordinary snapshots to compelling visual narratives.
Instant Download Architecture Photography & Retouching by Tony Roslund
Comparison of Equipment
Equipment Type | Recommended Models | Benefits |
**Cameras** | Canon EOS R5, Sony A7R IV | High resolution, superior dynamic range, excellent low light performance |
**Wide-Angle Lenses** | Canon EF 16-35mm f/4L, Nikon Z 14-30mm f/4 S | Increased field of view, great for expansive areas |
**Tilt-Shift Lenses** | Canon TS-E 24mm f/3.5L II | Corrects perspective distortion, maintains straight lines |
**Tripods** | Manfrotto Befree Advanced Aluminum Tripod | Stability for long exposures, adjustable height |
**Lighting Equipment** | Godox AD200Pro, Softboxes | Enhanced lighting for interiors and exteriors |
This selection of gear ensures that photographers are prepared to tackle the diverse challenges presented in architectural photography, allowing them to frame captivating images that will inspire the viewer.
Cameras Suitable for Architectural Photography
Choosing the right camera is crucial in architecture photography, where detail and accuracy are of utmost importance. Cameras that offer high resolution and dynamic range are often preferred. Full-frame DSLRs and mirrorless models are the best contenders in this realm, as they can accommodate a range of lenses and deliver exceptional image quality.
- Canon EOS R5: This camera features a 45 MP sensor, making it a favorite among professional architectural photographers. Its excellent low-light performance and fast autofocus are complemented by the ability to shoot at high shutter speeds, allowing for crisp images even with wide aperture settings.
- Sony A7R IV: Renowned for its stunning resolution of 61 MP, the A7R IV excels in capturing minute details in architectural compositions. Its advanced sensor technology also enhances color accuracy and dynamic range, ensuring that the subtleties of light and shadow are well represented.
- Nikon Z7 II: Another strong contender, this camera features a 45.7 MP sensor and is known for its ergonomics and reliable image performance. The Z7 II's dual card slots are beneficial for professionals who require additional storage space when covering large projects.
- Fujifilm GFX 100: This medium-format option boasts a resolution of 102 MP, offering incredible detail and tonal range that can capture intricate architectural designs. Its size may be a drawback in portability; however, the image quality it provides is often worth the trade-off.
Conclusion of Camera Comparison
Selecting the right camera for architectural photography involves understanding the specific needs of the project at hand. While high resolution is essential for capturing details, features like low-light performance and dynamic range also play a significant role. A camera that fits snugly into a photographer's hands, suits their shooting style, and complements their lens choice can significantly influence the outcome of architectural projects.
Camera Model | Resolution | Dynamic Range | Low-Light Performance | Weight |
**Canon EOS R5** | 45 MP | Excellent | Great | 650g |
**Sony A7R IV** | 61 MP | Outstanding | Very Good | 665g |
**Nikon Z7 II** | 45.7 MP | Excellent | Good | 705g |
**Fujifilm GFX 100** | 102 MP | Superb | Good | 1400g |
This table provides a quick reference for comparing camera options, empowering photographers to make informed decisions based on technical specifications and suitability for architectural photography.
Lenses for Capturing Architectural Details
When it comes to architectural photography, lenses play a pivotal role in defining the final image. They allow photographers the flexibility to explore different perspectives and control the scenes they capture. For architecture, tilt-shift and wide-angle lenses stand out for their unique capabilities.
- Tilt-Shift Lenses: These special lenses provide photographers with the ability to control perspective and correct distortion. The Canon TS-E 24mm f/3.5L II and Nikon PC-E Nikkor 45mm f/2.8D are two prime examples that enable users to shift the perspective, eliminating the convergence of vertical lines in tall structures effectively.
- Wide-Angle Lenses: Ideal for capturing expansive scenes, lenses like the Canon EF 16-35mm f/4L and Nikon 14-24mm f/2.8G ensure photographers can fit more of a scene within the frame. These lenses offer a wider field of view, making them essential for photographing large buildings or sprawling urban settings.
- Standard Zoom Lenses: While not primarily for architecture, these lenses can be versatile for various situations. The Nikon 24-70mm f/2.8G ED-IF AF-S Nikkor allows photographers to capture details and portraits with manageable distortion, serving well for both architectural and lifestyle shots.
Additional Lens Considerations
It's important to select a lens that matches the photographer's style and the architectural context being captured. Sometimes, the desired perspective can be achieved with the help of a quality prime lens, such as an 85mm or 50mm, which allows for high levels of sharpness and clarity.
Lens Type | Recommended Models | Benefits |
**Tilt-Shift Lenses** | Canon TS-E 24mm f/3.5L II, Nikon PC-E 45mm cl | Corrects perspective distortion |
**Wide-Angle Lenses** | Canon EF 16-35mm f/4L, Nikon 14-24mm f/2.8G | Captures wide expanses |
**Standard Zoom** | Nikon 24-70mm f/2.8G | Versatile for architectural shots |
Each type of lens brings distinct advantages tailored to various architectural photography scenarios. Photographers should choose their lenses with careful consideration of the characteristics they want to highlight in their images.
Importance of Tripods and Stabilization Gear
In the domain of architectural photography, where stability can make the difference between a sharp image and a blurring mess, tripods are indispensable. They offer various benefits essential for producing high-quality images:
- Stability: A sturdy tripod eliminates camera shake, which is particularly critical in low-light environments or with longer exposure times. Shake can ruin the finest shots, making a tripod non-negotiable for sharp images.
- Consistency in Composition: A tripod allows for precise composition adjustments while maintaining the same framing. For repetitive shots, such as those needed in timelapse photography or multi-angle perspectives, this consistency is invaluable.
- Long Exposures: Shoot scenes like bustling urban landscapes or architectural details over extended periods to capture light trails or ambient environments. A tripod is crucial for maintaining image clarity when using slower shutter speeds.
- Versatility: High-quality tripods can adapt to different terrains with quickly adjustable leg angles. Photographers can maneuver easily on uneven surfaces, allowing for creativity in composition.
- Accessory Integration: Tripods often have slots for additional gear, such as panoramas or external lighting devices, enabling photographers to create more complex compositions without compromising stability.
Tripod Model | Stability Rating | Max Height | Weight | Price (approx.) |
**Manfrotto Befree Advanced** | Excellent | 150 cm | 1.49 kg | 3,500,000 VND |
**Gitzo Traveler Series** | Outstanding | 160 cm | 1.35 kg | 10,600,000 VND |
**Sirui P-326S** | Very Good | 165 cm | 1.07 kg | 2,800,000 VND |
Each of these tripods caters to different preferences and styles, allowing photographers to tailor their choices based on their shooting environments.
Techniques for Capturing Architectural Photography
When it comes to architectural photography, understanding various techniques is just as crucial as having the right equipment. Here are some essential practices to produce captivating images:
- Composition Techniques: Utilizing the rule of thirds, emphasizing symmetry, and leading lines significantly enhance an image’s appeal. By strategically framing structures, photographers can draw viewers’ eyes toward the key elements of the architecture.
- Lighting Considerations: The quality of light plays a vital role in architectural photography. Natural lighting is often the best option. Conditions during the golden hour provide a unique warmth, while blue hour contrasts artificial lights with the coolness of the sky.
- Camera Angles: By employing various angles high, low, or eye-level photographers can create different perceptions of the same structure, providing depth and context. A low-angle shot can make buildings tower majestically, while a high-angle can capture a broader visual narrative of urban environments.
- Post-Processing: The editing phase is integral to achieving the final vision. Correcting lens distortion, enhancing colors, and fine-tuning contrast can elevate images to a professional standard.
- Capturing Details: Focusing on intricate architectural elements like patterns, textures, and unique features allows photographers to highlight the craftsmanship involved in creating the building. This technique draws attention to the design's artistry.
Technique Category | Considerations | Example Application |
**Composition** | Rule of thirds, leading lines, balance | Framing key elements dynamically within the shot |
**Lighting** | Natural vs. artificial, golden and blue hours | Using soft morning light for exteriors |
**Camera Angles** | Low-angle, high-angle, eye-level | Capturing the height and scale of skyscrapers |
**Post-Processing** | Distortion correction, color enhancement, contrast | Using Adobe Lightroom for final touches |
**Detail Focus** | Patterns, textures, unique architectural features | Isolating decorative elements in close-up shots |
The interplay of these techniques creates compelling architectural images that inspire wonder and appreciation in viewers.
Best Lighting Conditions for Architectural Shots
Light can make or break architectural photography. The quality, direction, and intensity of light significantly affect how structures are depicted. Here are some guidelines for optimal lighting conditions:
- Golden Hour: The warm, diffused light shortly after sunrise or before sunset adds a magical quality to architectural images, enhancing tones and shadows. This is preferred for exterior shots.
- Blue Hour: This transitional time provides a stunning contrast between warm artificial lights and the cool hues of the sky. Photographers can achieve mesmerizing compositions when capturing urban settings.
- Overcast Days: Clouds act as a natural diffuser, providing soft light that minimizes harsh shadows and reduces glare. These conditions are especially useful for capturing fine details without direct sunlight.
- Artificial Lighting: Inadequate natural light can be supplemented through external flashes and lighting gear. Properly positioned lights can help illuminate the architecture or evoke mood in interior shots.
- Controlling Harsh Light: During midday when the sun is direct, consider using reflectors or diffusers to soften shadows and highlight details more smoothly. This technique can create a more balanced exposure.
Lighting Condition | Best for | Techniques Used |
**Golden Hour** | Exterior shots | Soft, warm light enhancing textures |
**Blue Hour** | Urban landscapes | Contrasts between natural and artificial lights |
**Overcast** | Detail shots | Diffused light minimizing shadows |
**Artificial Light** | Interiors | Use of off-camera flashes to fill spaces |
**Harsh Light Control** | Any time | Reflectors/diffusers for balanced exposure |
Understanding these lighting nuances and applying them well can transform mundane imagery into breathtaking visual storytelling.
Utilizing Camera Angles and Perspectives
The architectural narrative is also constructed through conscious choices concerning camera angles and perspectives. Here are some key strategies:
- Low Angles: By positioning the camera low to the ground, a photographer can emphasize the building's grandeur and create a sense of importance. This angle can also articulate a relationship with the surrounding environment.
- High Angles: Shooting from a height brings a broader context to the scene, allowing photographers to explore the interaction between the structure and its urban or natural landscape.
- Eye Level: An eye-level perspective provides a natural view that feels familiar. It’s effective for capturing symmetry and direct relationships between the elements of a building.
- Diagonal Composition: Instead of framing buildings squarely, tilting the camera can introduce an energetic angle that adds dynamism and movement to architectural photos.
- Incorporating Negative Space: Sometimes, framing structures with adequate negative space allows the architecture to "breathe," emphasizing isolation or adding a layer of context to the photograph.
Summary of Camera Angle Strategies
Camera Angle | Effect on Architecture Photography | Example Caption |
**Low Angle** | Emphasizes height and importance | "The edifice towers over the cityscape." |
**High Angle** | Contextualizes architecture within its environment | "Nestled among trees, the pavilion rises." |
**Eye Level** | Creates relatable, familiar viewpoints | "A charming library beckons visitors." |
**Diagonal Composition** | Adds dynamism and movement to the shot | "A vibrant city corner, alive with energy." |
**Incorporating Negative Space** | Emphasizes isolation or context | "The solitude of the structure conveys calm." |
The thoughtful application of angles and perspectives allows photographers to narrate the architecture's significance in captivating and evocative ways, ensuring the construction stands boldly within the frame.
Composition Techniques for Architectural Photography
To effectively convey the essence of architectural beauty, composition plays a critical role. Here are some effective techniques to consider:
- Rule of Thirds: Dividing the frame into nine equal parts by overlaying two horizontal and vertical lines enables photographers to place key elements at the intersections, creating a dynamic composition that draws the viewer’s eye.
- Leading Lines: Using design features, pathways, or adjacent structures to guide the viewer's eye brings focus to the primary subject of the image, creating a sense of depth and perspective.
- Framing: Natural elements or architectural features can be used to frame a subject, providing context and adding layers to the scene. This technique enriches the composition and makes images feel more immersive.
- Symmetry and Patterns: Many architectural spaces thrive on symmetry. Highlighting symmetrical structures fosters a harmonious visual that captivates viewers’ attention. Alternatively, focusing on patterns within the architecture can offer striking details.
- Depth and Layering: Introducing foreground elements into an image can create a sense of depth. Composing images in such a way that layers interact gives dimension to the scene, making it visually engaging.
Composition Technique | Advantages | Example Application |
**Rule of Thirds** | Creates balance and tension in the image | Positioning a tower off-center |
**Leading Lines** | Guides the viewer's eye to the focal point | Pathways drawing attention to an entrance |
**Framing** | Adds context and layers to the composition | Archways framing the main structure |
**Symmetry** | Enhances visual harmony | Reflections in modern glass buildings |
**Depth and Layering** | Creates spatial interest | Foreground gardens adding layers to cityscapes |
By implementing these composition techniques, photographers can produce visually striking images that resonate with viewers while effectively showcasing architectural designs.
Post-Processing in Architectural Photography
Post-processing edits can elevate architectural photographs from good to spectacular. The initial raw image often requires subtle adjustments to achieve optimal clarity and depth, making the right post-processing techniques essential. Here’s a look at effective strategies:
- Basic Corrections: Start with simple adjustments, including exposure, contrast, and white balance. These modifications enhance overall image quality and accurately represent the architectural features.
- Lens Correction: Many software suites like Adobe Lightroom provide lens correction profiles tailored to specific lenses, compensating for distortion and vignetting. Applying these can provide crisp, flawless lines that emphasize the design's details.
- Perspective Correction: Using tools like the "Transform" panel in Lightroom allows photographers to adjust vertical and horizontal lines to ensure architectural integrity. It eliminates distortions common in architectural shots, ensuring that lines remain straight and true.
- Color Grading: Fine-tuning colors enriches images and ensures that they are visually cohesive. Adjusting the vibrance and saturation can create a mood that complements the structure and lighting.
- Sharpening and Noise Reduction: After applying corrections, it’s crucial to sharpen images to bring out fine details. However, an essential balancing act exists in retaining natural color and texture. Similarly, using noise reduction tools will help maintain clarity without losing detail.
Post-Processing Technique | Purpose | Recommended Software |
**Basic Corrections** | Enhances image quality | Adobe Lightroom, Photoshop |
**Lens Correction** | Corrects lens-specific distortions | Adobe Lightroom, Capture One |
**Perspective Correction** | Straightens lines for architectural precision | Adobe Lightroom, Photoshop |
**Color Grading** | Adjusts colors for visual impact | Adobe Lightroom, Capture One |
**Sharpening/Noise Reduction** | Brings out details, manages noise | Adobe Lightroom, Photoshop |
Effective post-processing extends beyond mere enhancement; it is about refining the narrative captured within the frame. Architectural photography hinges on these subtle digital brushstrokes to ensure that the image faithfully represents the beauty of its subject.
Editing Software Recommendations
Editing software can either make or break the quality of architectural photography. Here’s a breakdown of popular choices and their features:
- Adobe Photoshop: Renowned for its comprehensive editing capabilities, Photoshop offers tools for retouching, compositing, and design. It enables intricate edits at the pixel level, allowing photographers to manipulate images beyond simple adjustments.
- Adobe Lightroom: A go-to for many photographers, Lightroom excels in cataloging and processing images efficiently. It holds capabilities for bulk editing, allowing photographers to apply changes across multiple images rapidly.
- Capture One: Favorable for its high-quality RAW processing and tethering capabilities, Capture One offers advanced color grading tools and customizable workspaces suited for professional environments.
- Affinity Photo: A powerful alternative to Lightroom and Photoshop, Affinity Photo scales back editing complexity and cost without sacrificing essential features.
- GIMP: As an open-source tool, GIMP provides solid editing capabilities at no cost, making it accessible for photographers on a budget.
Software | Key Features | Price (approx.) |
**Adobe Photoshop** | Extensive editing capabilities | 700,000 VND/month (subscription) |
**Adobe Lightroom** | Efficient image cataloging and batch edits | 650,000 VND/month (subscription) |
**Capture One** | High-quality RAW processing, tethering | 3,800,000 VND (one-time payment) |
**Affinity Photo** | Cost-effective with essential features | 1,600,000 VND (one-time payment) |
**GIMP** | Open-source, feature-rich | Free |
With careful consideration of software features relative to individual needs and preferences, photographers can select the best tools for their post-processing workflow that will enhance their architectural photography.
Techniques for Correcting Distortion and Perspective
Architecture often presents unique challenges in terms of distortion and perspective. Proper techniques can mitigate these issues and ensure that images reflect the true nature of buildings. Here’s a look at effective correction methods:
- Using Lens Correction Profiles: Many editing applications now feature automatic lens correction options. When enabled, these profiles compensate for specific lens distortions and vignettes, providing straight lines and true geometries in architectural images.
- Manual Perspective Correction: In software like Adobe Lightroom, you can access the "Transform" tool to manually adjust vertical and horizontal lines by dragging reference lines along the edges of buildings. This precise control enables you to correct convergence and maintain the structure’s integrity.
- Employing Tilt-Shift Lenses: By utilizing tilt-shift lenses at the time of shooting, photographers can reduce perspective distortion significantly. The ability to shift the lens while keeping the camera level helps capture straight lines from the outset, minimizing the need for extensive post-processing.
- Cropping Techniques: Sometimes correcting perspective involves cropping the image to emphasize a cleaner design. However, be cautious not to cut critical features that contribute to the structure's narrative.
- Comprehensive Post-Processing Workflow: Implementing a structured approach in post-processing such as correcting lens distortion first, followed by exposure and color adjustments can streamline the editing process while ensuring cohesive results.
Correction Technique | Description | Ideal Usage |
**Lens Correction Profiles** | Automatic fixes for specific lens issues | General image enhancement |
**Manual Perspective** | Adjusts convergence and straightens lines | Architectural shots with lines |
**Tilt-Shift Lenses** | Capture straight lines at the source | When shooting tall buildings |
**Cropping Techniques** | Refine compositions to emphasize structures | Need for clarity and balance |
**Post-Processing Workflow** | Logical progression of edits | Comprehensive enhancement |
By employing these techniques, photographers can effectively manage distortion and perspective challenges, ensuring that architectural images reflect the intended vision and structural elegance.
Tips for Specific Architectural Photography Styles
Differentiating styles in architectural photography requires tailored approaches and techniques. Here are tips to capture various styles effectively:
- Modern Architecture: For sleek, minimalistic designs, focus on clean lines and highlight unique materials. Utilize wide-angle shots that emphasize the expansive, open space while keeping elements uncluttered to maintain a contemporary feel.
- Historical Buildings: When photographing historical structures, explore their surrounding environments. Showcase details that emphasize the character and heritage. Use softer light, often found during the golden hour, to enhance textures and evoke nostalgia.
- Interior Spaces: Utilize wider lenses for interior shots while ensuring that your composition balances elements within the room. Pay attention to lighting, using external flashes or reflectors to achieve an inviting ambiance. The aim is to create an immersive experience for viewers.
- Urban Landscapes: For capturing urban areas, emphasize context. Incorporate vibrant streets, movement, and life that exists around structures. Perspective distortion can be creatively embraced to capture the hustle of city life while reflecting architectural beauty.
- Nature-Integrated Structures: When photographing buildings nestled in natural environments, strive to balance architecture and nature. Use longer focal lengths to compress elements, bringing the architectural features closer to their surroundings.
Style | Key Photography Tips | Example Scenario |
**Modern Architecture** | Focus on clean lines and angles | Capturing skyscrapers in urban settings |
**Historical Buildings** | Highlight character, use warm lighting | Shooting at dusk for heritage sites |
**Interior Spaces** | Utilize wide angles, manage interior light | Capturing cozy interiors |
**Urban Landscapes** | Emphasize context with movement | Photographing busy street scenes |
**Nature-Integrated Structures** | Balance architecture and nature | Capturing buildings amongst trees |
Understanding the nuances of specific architectural styles empowers photographers to capture images that tell rich, diverse stories about spaces, structures, and surrounding environments.
Interior Architectural Photography Techniques
Capturing the intricacies of interior architecture presents unique challenges. Here are essential techniques for mastering interior spaces:
- Use of Tripods: Stabilization is crucial for shooting interiors, where low light often prevails. Tripods minimize camera shake and enable longer exposures without compromising sharpness.
- Natural Light Utilization: maximize natural light, especially from windows, to create warm, inviting scenes. Utilize overcast days to diffuse harsh sunlight, resulting in even, soft lighting.
- Strategic Flash Techniques: If natural light is insufficient, off-camera flashes or softboxes can illuminate spaces without creating harsh shadows. Bouncing light from walls or ceilings softens its impact.
- Focus on Composition: Rather than attempting to capture the entire room, concentrate on specific features or walls. This approach creates cleaner lines and enhances the architectural narrative.
- White Balance Adjustments: Accurately adjusting white balance is essential to prevent unnatural color casts. Using a gray card ensures color accuracy rapidly becomes reliable in post-processing.
Technique | Purpose | Example Application |
**Use of Tripods** | Stabilization for low-light conditions | Long exposure shots with ambient light |
**Natural Light** | Create warmth and reduce shadows | Utilizing daylight for interiors |
**Flash Techniques** | Soft, diffused light texture | Off-camera flash to fill dark spots |
**Focus on Composition** | Highlight specific architectural features | Concentrating on ornate details |
**White Balance Adjustments** | Ensure accurate color representation | Using gray cards for precise shots |
By implementing these techniques, photographers can effectively address the unique challenges of interior architectural photography, capturing the beauty and ambiance inherent in well-designed spaces.
Challenges in Architectural Photography
Every field has its challenges, and architectural photography is no different. Here are some common hurdles along with potential solutions:
- Lighting Conditions: Often, interiors have mixed lighting sources, which can lead to inconsistent color temperatures and undesired shadows. Consider using white balance tools or conducting a preliminary shoot to understand and adjust accordingly.
- Space Constraints: Limited space can complicate compositions in tight areas or urban environments. Taking preparatory shots and finding optimal angles will help mitigate some challenges.
- Perspective Distortion: Architecture often creates unique angles that introduce distortion during capturing. Utilizing tilt-shift lenses or post-processing adjustments is vital for correcting perspective issues.
- Retouching Limitations: While retouching can solve many issues, over-editing may produce unnatural results. Balancing enhancement with accurate representation is essential in preserving authenticity.
- Technical Skills Requirement: Architectural photography requires technical expertise with both camera equipment and post-processing software. Continuous learning and practice are paramount to mastering these skills over time.
Challenge | Solutions | Tips |
**Lighting Conditions** | Use color balance tools | Conduct preliminary shoots |
**Space Constraints** | Find optimal angles | Utilize wide-angle lenses |
**Perspective Distortion** | Use tilt-shift lenses and post-processing | Correct lines in editing |
**Retouching Limitations** | Avoid over-editing | Balance enhancement with authenticity |
**Technical Skills Requirement** | Continuous learning | Participate in workshops |
Navigating these challenges effectively can foster great opportunities for success in architectural photography, turning hurdles into avenues for creativity.
Managing Dynamic Range in Architectural Photography
Dynamic range refers to the span of light intensities a camera can capture, from the darkest shadows to the brightest highlights. Achieving balance is critical in architectural photography, where both extremes may be present in a single image. Here are practical strategies:
- HDR Techniques: Using high dynamic range techniques involves capturing multiple exposures typically three or more at different shutter speeds and combining them in post-processing. This strategy ensures detail retention in both highlights and shadows.
- Exposure Compensation: Applying exposure compensation allows photographers to adjust the automatic exposure settings for capturing scenes with challenging lighting. This helps ensure critical details are preserved in highlights without losing shadows.
- Soft Light Utilization: On overcast or cloudy days, the natural diffusion of light helps balance exposure, making it easier to capture details without harsh contrasts.
- Use of Neutral Density Filters: These filters reduce light intensity without compromising color, allowing longer exposures even in brighter conditions. Such filtering prevents overexposure and maintains detail in images.
- Post-Processing Enhancements: In editing software, selectively adjusting highlights, shadows, and contrast can significantly improve dynamic range perception. This process allows for the extraction of robust details from both underexposed and overexposed areas.
Technique | Purpose | Example Application |
**HDR Techniques** | Capture a wider range of light | Blending multiple exposures |
**Exposure Compensation** | Prevent loss of detail in highlights | Adjusting settings for sunlight shots |
**Soft Light Utilization** | Balance exposure | Shooting on overcast days |
**Neutral Density Filters** | Control light without affecting color | Long exposure during bright days |
**Post-Processing Enhancements** | Fine-tune highlights and shadows | Refining exposure in Lightroom |
Effective management of dynamic range not only enhances the technical quality of images but also elevates the emotional impact they convey.
Dealing with People and Crowds in Popular Locations
Popular architectural locations often attract crowds, making photography challenging. Here are strategies for navigating these dynamics:
- Timing Your Shoots: Shoot during less crowded times, such as early mornings or weekdays, to capture locations devoid of distractions. Golden hour shots typically yield the best light along with fewer people.
- Incorporating Crowds: If removing people proves difficult, consider integrating them into your shots. This approach can add context and life to an image, showcasing how architecture interacts with society.
- Using Telephoto Lenses: When crowds are unavoidable, a telephoto lens allows for more intimate shots without intruding on personal space. Zooming in brings focus to architectural details while minimizing surrounding distractions.
- Framing Techniques: Use architectural elements to frame your shots, directing attention toward the structure rather than the people around it. This technique helps maintain focus while still capturing the surrounding environment.
- Post-Processing Solutions: In cases where individuals detract from the image, retouching can help eliminate distractions. Using software tools like Photoshop, photographers can seamlessly remove unwanted elements to enhance the composition.
Strategy | Application | Benefits |
**Timing Your Shoots** | Shoot during off-peak hours | Minimize interruptions |
**Incorporating Crowds** | Capture urban life in architecture | Adds context and vibrancy |
**Using Telephoto Lenses** | Capture details while maintaining distance | Isolates architecture from distractions |
**Framing Techniques** | Incorporate architectural features as frames | Maintains focus on the primary subject |
**Post-Processing Solutions** | Clean up images | Eliminates distractions post-capture |
With proper planning and creativity, photographers can thrive in crowded locations, transforming potential obstacles into elements of connection and context within their architectural imagery.
Resources for Learning Architectural Photography
As the pursuit of mastery in architectural photography unfolds, numerous resources are available to guide photographers. Here are notable suggestions for expanding knowledge and skillsets:
- Photography Life: This educational platform hosts a collection of tutorials covering equipment, techniques, and insights on both interior and exterior architectural photography. It caters to various skill levels and offers masterful guidance.
- Domestika - Introduction to Architectural Photography: This online course, offered in multiple languages including English, teaches photography basics and compositional strategies geared specifically toward architecture.
- Class Central: Features a gathering of online courses from popular platforms such as LinkedIn Learning and Udemy. This resource allows learners to select subjects based on their expertise level, providing structure and comprehensive insight.
- Architectural Photography Tutorial: This educational site combines free resources with links to professional online courses on camera settings and composition techniques specific to architecture.
- Tony Roslund's Architectural Photography & Retouching: Specifically focused on both photographic techniques and retouching advice, his work often appears in various photography blogs and video tutorials. Seeking out his content can deepen understanding and technical skill in architectural photography.
Resource | Type | Highlights |
**Photography Life** | Online Tutorials | Comprehensive knowledge on equipment and technique |
**Domestika Courses** | Online Learning | Multilingual course focused on architecture photography |
**Class Central** | Course Aggregator | Access diverse photography learning options |
**Architectural Tutorials** | Educational Content | Free and paid resources for efficient learning |
**Tony Roslund** | Tutorials and Guides | Insights on photography and retouching |
By utilizing these resources, aspiring architectural photographers can enhance both their craft and overall understanding of the discipline, paving their way toward success.
Online Tutorials and Video Guides
Online tutorials have become indispensable avenues for grasping photography techniques, especially in the realm of architecture. Consider the following platforms:
- YouTube: A treasure trove of video tutorials covering all facets of architectural photography, from gear recommendations and shooting techniques to advanced editing processes. Channels by industry experts often feature real-time demonstrations, fostering an engaging learning experience.
- Skillshare: Offers a wide array of photography classes, including sessions specifically focused on architectural photography. Effective for self-paced learning, these courses allow photographers to explore different styles and techniques in structured formats.
- CreativeLive: This platform hosts live classes from leading industry experts and allows participants to interact and learn in real-time. Many architectural photography classes delve into niche aspects of the discipline, providing valuable insights and examples.
- LinkedIn Learning: Previously known as Lynda.com, this site presents curated content on photography covering everything from the basics to advanced strategies in architectural photography. Subscription grants access to thousands of tutorials.
- Domestika: A creative learning platform that oftentimes features courses by renowned photographers. The courses are usually well-produced, breaking down concepts into manageable lessons, ideal for those interested in a comprehensive understanding of architectural photography.
Platform | Focus Area | Notable Features |
**YouTube** | Comprehensive tutorials | Real-time demonstrations |
**Skillshare** | Self-paced learning | Variety of styles and techniques |
**CreativeLive** | Live classes and interaction | Engagement with experts and crowd feedback |
**LinkedIn Learning** | Curated learning resources | Thousands of tutorials available |
**Domestika** | Courses by industry professionals | High-quality production and clear instruction |
These platforms enrich the continued education of photographers, fostering growth and experimentation in various architectural photography methods.
Recommended Books on Architectural Photography
Books serve as a wealth of knowledge, offering insights from industry experts. Here are recommended reads that provide multifaceted perspectives on architectural photography:
- "Architectural Photography: Composition, Capture, and Digital Image Processing" by Adrian Schulz – This comprehensive guide combines technical skills with artistic insights, making it suitable for both beginners and seasoned photographers.
- "Professional Architectural Photography" by Michael Harris – This book emphasizes foundational techniques and provides a historical context for photography, allowing readers to appreciate the evolution of architectural representation.
- "Shooting Space: Architecture in Contemporary Photography" by Elias Redstone – A visually stunning book that combines artistic photography with essays from leading voices in architecture showcases the interplay between architects and photographers in contemporary design.
- "Photographing Buildings Inside and Out" by Norman McGrath – Although written in the pre-digital age, this classic still holds its relevance, serving as a guide for capturing both exteriors and interiors effectively.
- "Retouching in Architectural Photography" by Tony Roslund – Known for his insights into post-processing techniques, this book offers strategies for enhancing architectural images through effective retouching practices.
Book Title | Author | Focus Area |
**"Architectural Photography"** | Adrian Schulz | Composition, capture, digital editing |
**"Professional Architectural Photography"** | Michael Harris | Foundations and historical context |
**"Shooting Space"** | Elias Redstone | Contemporary architectural representation |
**"Photographing Buildings Inside and Out"** | Norman McGrath | Effective interior and exterior techniques |
**"Retouching in Architectural Photography"** | Tony Roslund | Post-processing strategies |
Exploring these books provides a deeper understanding of architectural photography that transcends mere technical prowess, integrating aesthetic principles and narrative exploration.
Architectural Photography Portfolio Recommendations
Building a remarkable architectural photography portfolio requires careful curation and thoughtful representation of skills. Here are recommendations on what to include:
- Cohesive Theme: Your portfolio should have a consistent visual narrative. Aim for a unified style in compositions whether it’s through color tone, lighting, or approach that resonates with your overall artistic vision.
- Selectivity: Aim for quality over quantity in showcasing work. Fewer high-quality images representing various architectural styles speak volumes about your capability as a photographer.
- Diverse Types: Include a variety of projects that highlight versatility. This allows potential clients to see proficiency in different architectural types including commercial, residential, and urban environments.
- Strong Compositions: Display well-composed images utilizing leading lines, symmetry, and framing effectively. Each photograph should tell visual stories that engage the audience and invite them into the architectural narrative.
- Post-Processing Quality: Ensure all images undergo professional editing. High-quality edits enhance overall aesthetics and show meticulous attention to detail, making the works stand out.
Portfolio Element | Importance | Tip for Development |
**Cohesive Theme** | Presents a unified artistic vision | Maintain consistent visual elements agency |
**Selectivity** | Quality representation in limited selection | Focus on standout images |
**Diverse Types** | Showcases versatility across architectural types | Include various styles and projects |
**Strong Compositions** | Engages viewers’ attention | Utilize composition techniques |
**Post-Processing Quality** | Enhances visual aesthetics | Use professional edits for polish |
Selecting and showcasing a well-rounded architectural photography portfolio can ultimately engage potential clients and demonstrate a photographer’s skillset an essential aspect of succeeding in the increasingly competitive industry.
Elements of a Strong Architectural Portfolio
Creating a strong architectural portfolio requires more than just including excellent photographs; the presentation also plays a crucial role. Here are key elements that contribute to a compelling portfolio:
- Diverse Selection: Include a mix of exterior and interior shots, allowing viewers to see your range. This can include capturing different types of buildings, from residential homes to grand commercial structures.
- Integration of Context: Portray the structures within their environments, showcasing how architecture interacts with surrounding landscapes or urban settings. Contextual images can offer a relatable experience to viewers.
- Narrative Cohesion: Each element of your portfolio should tell a part of a larger story. Whether through chronological progress or thematic styles, ensure that your images collectively communicate an overall message or feeling.
- Attention to Detail: Include macro shots of intricate details be it decorative elements or unique materials used in the architecture. Highlighting these features demonstrates your keen eye for architecture’s craftsmanship.
- Presentation Quality: The physical or digital format of your portfolio should be high quality. Ensure images are displayed clearly and causing no distractions. The layout should enhance viewer experience rather than detract from the images themselves.
Portfolio Element | Description | Strategy for Implementation |
**Diverse Selection** | Showcases range of capabilities | Include various types of architecture |
**Integration of Context** | Illustrates structure interaction | Capture buildings within environments |
**Narrative Cohesion** | Tells a detailed architectural story | Create themes that connect photos |
**Attention to Detail** | Highlights craftsmanship and unique features | Include macro shots of architectural details |
**Presentation Quality** | Ensures professional display | Use high-quality prints or layouts |
By incorporating these elements effectively, photographers can construct portfolios that impress clients, meriting attention in the competitive landscape of architectural photography.
Case Studies of Successful Architectural Photography
An in-depth look at successful architectural photography projects can serve as inspiration for aspiring photographers. Here are notable examples:
- Julius Shulman: Renowned for his iconic photographs of mid-century modern architecture, Shulman’s work captures not just the structures themselves but the environments surrounding them. His distinctive angles and the play of light transformed architectural photography, influencing many future photographers.
- Iwan Baan: Known for his documentary style, Baan captures built environments alongside their inhabitants. His compelling storytelling approach emphasizes how architecture interacts with the lives of people, often utilizing unexpected angles that reveal broader cultural contexts.
- Tony Roslund: In his series "Architecture Photography & Retouching," Roslund exemplifies detail-oriented photography by capturing the subtleties of architectural design while combining technical skills with artistic expression. His work illustrates the importance of fixing perspective and distortion through effective editing.
- Balthazar Korab: A master of light and space, Korab captured many prominent buildings, emphasizing the interplay between structure and its surroundings during different times of day. His images provide viewers with a sense of scale and context, celebrating architecture’s essence.
Conclusion
Architecture has a profound impact on our lives, and the art of capturing its beauty requires a unique blend of technical skill, artistic vision, and understanding of the environment. As we've explored throughout this article, architectural photography intertwines equipment, techniques, and post-processing strategies essential for creating striking images.
Investing time in mastering the right equipment, utilizing various lenses, and exploring different camera angles provides photographers with the tools to depict the grandeur of structures. In addition, understanding lighting conditions and emphasizing composition enhances the storytelling element of architectural images, bringing the structures to life.
With these insights, aspiring photographers can appreciate that architectural photography is not simply a profession but a journey of visual exploration rooted in creativity and passion. By continuing to learn from the successes of others whether through case studies, engaging resources, or nurturing their portfolios photographers can leave their mark in this dynamic field, bridging the gap between artistry and the built world around us.